Palette Garage FAQs and HINTS
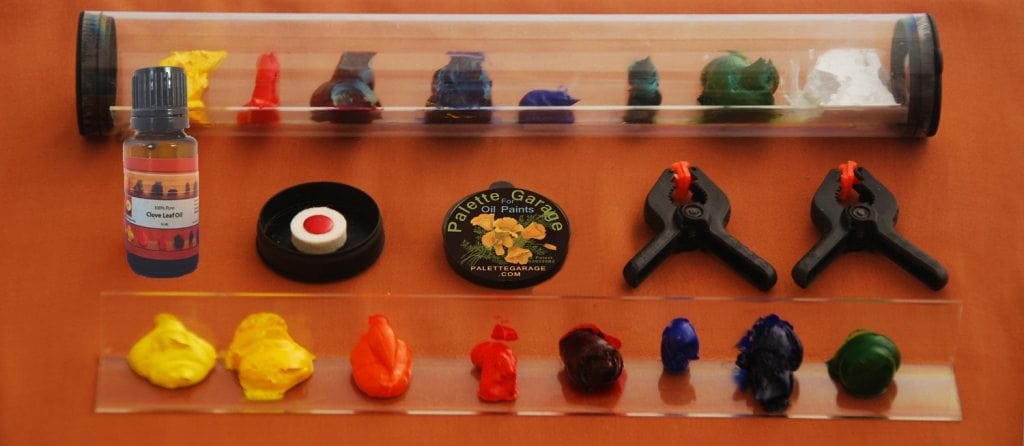 Help. My end caps keep popping off.
Normally, the endcaps fight tightly into the Palette Garage tube; however, if you change elevation, like driving up a mountain to paint, then the air inside the tube will be at a higher pressure than the air outside the tube. This can result in the end caps being popped off. To prevent this, simply put some masking tape over the top of the end cap and down the tube an inch or so creating a tape “hinge” for the end cap. Then wrap some tape around the circumference of the tube to secure the bottom of the hinge. This also helps keep the caps on when the PG is jostled in your pack or supply bag.
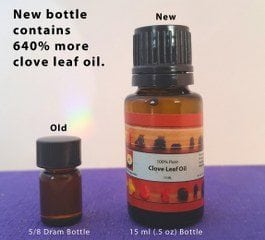 How much clove oil comes with the Palette Garage?
We’ve upgraded the clove oil in 2016 and we now include the larger 15 ml size. This bottle should last a long time — perhaps a year. Since we replaced the very small bottle with the large one, we had to raise the price of the palette garage. You can always buy more clove oil on this website or you can find it at a health store. Be sure to get either clove LEAF or clove STEM oil (not clove bud oil, which has less eugenol in it).
How often do I need to add clove oil to my Palette Garage?
How often you add clove oil depends on how much you have disturbed your piles of paint on the tray. If the paint is new and you “charge” the endcap felt fully, and close the PG without using any paint, then that paint will stay for months without adding more oil. Once you start painting with the piles of paint, you are exposing a new paint surface to the oxidizing air. The older, undisturbed outer molecular surface had absorbed the eugenol from the clove oil and was protected from oxidation. Once you dip a brush or palette knife into you paint piles you expose”unprotected paint” to the air. Now you will need to add a bit of clove oil before you close up the palette garage so that that newly exposed paint can absorb some eugenol from the clove oil .
Can I use something other than clove oil to protect my paints? Clove oil is the Eugenol queen. Eugenol is also found in aromatic essential oils of nutmeg, cinnamon, basil, lemon balm, dill, wormwood, and bay leaf, but clove leaf oil has the highest concentration of eugenol: 82-88%. Do not drink the clove oil as it can be damaging to the liver if taken internally.
How can I clean my Palette Garage?
Put some rubbing alcohol or cleaning solution like Simple Green on a paper towel. Use a brush handle, chopstick, or other long object to swirl the damp paper towel inside the garage. Works like a charm. You can also clean the tray with alcohol.
How can I clean the felt wick? It’s full of paint and doesn’t hold enough clove oil.
First clean your felt wick with some alcohol on a paper towel. If you really want a fresh wick, unscrew the wick from the end cap, grab a hammer and some paper towels, and hammer the felt wick, moving it’s location on the folded towels each time you hammer. This will remove any excess oil and allow for a full recharge of clove oil. Fresh wicks will evaporate more eugenol to keep the paints moist. I suggest you do this every few months.
Will the Palette Garage affect the drying time of my paints?
No, it will not. Eugenol, the antioxidant which evaporates from the clove oil, only mixes with the outermost molecular layer of the paint, preventing oxidation. That’s why once you disturb the pile of paint with a brush or palette knife, it will need to absorb more eugenol (thus you add clove oil to the wicks).
I’ve noticed that some paint colors become stiff after a while, even in the Palette Garage.
Some earth colors will dry out much faster than other paints. They may last only a week or so in the Palette Garage before becoming stiff. If you want to keep them as long lasting as the other colors on the palette, then mix a couple of drops of clove oil into the earth color before putting away the paints in the Palette Garage.

How can I keep my paint piles separated?
If you place your paint piles closely together, they can touch, so allow for some room, especially at the ends of the tray where the paint might touch the felt wick. Dividers are not necessary, but if you want separate areas for each pile, take a glue gun and mark off the spaces you need. The glue dividers can easily be popped off if you make a mistake or decide you don’t like it. After several months, some of the glue dividers will loosen (that powerful clove oil!) and the glue dividers may need to be reapplied.
Be sure divide the paint tray by the number of colors you use and leave some free space at each end so you don’t crowd the clove oil wick. You may want to make some divisions larger, such as the one for ultramarine blue. I suggest you don’t put your white paint on the PG as many painters use a lot of white and it will take up valuable PG space. Just squeeze your white directly onto your mixing palette each time you paint. White is the least expensive color so it’s not so crucial to save left-over white.
Paint area dividers can be applied to paint tray with either a high or low temperature glue gun.
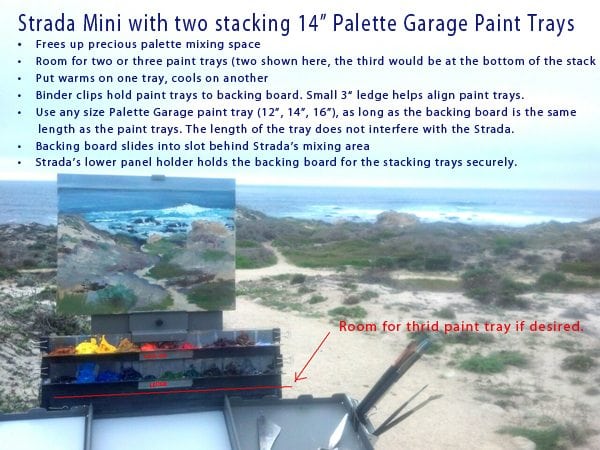 How can I make a stacking palette garage?
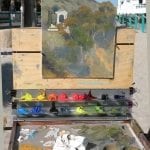
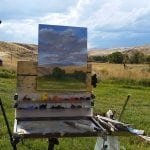
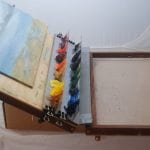
You can make your own stacking system for your pochade or easel by adapting the ideas presented in the following two documents. Look at the photos below and click on the link for the instructions.
Instructions for stacking Palette Garages on Strada Mini
Stacking Palette Grages on Open Box M
How to use the “Ruler of Thirds” that came with your order.
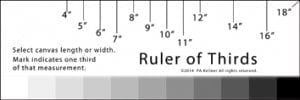
Ruler of Thirds helps to quickly divide your canvas into thirds
RULER OF THIRDS
- View your subject or a photo of your subject in a grid of thirds (see below for how to do this).
- Grid your canvas into thirds using the Ruler of Thirds.
- Draw your subject onto the canvas. Having both the subject and the canvas in the same 1/3 grid will make this so much easier.
Outdoors: Divide “picture plane” of your subject into thirds. Outdoors this can be done with a viewfinder that is marked off in thirds and is the same proportional dimensions as your canvas. For instance a 3” by 4” viewfinder (ratio of 3:4) will work for any canvas with the same ratio: 6 x 8; 9 x 12; or 12 x 16. A viewfinder with the ratio of 2:3 will work for canvases measuring 4×6, 8×12, etc. A view finder with a ratio of 1:1 will work a square canvas of any size. I like to use a viewfinder called “Compose-It-Grids” as it has six viewfinders of various ratios on one see-through acrylic sheet, and all of them are divided into thirds. Choose the grid that matches the proportions of your canvas, then look through the view finder to select your composition and you’ll see your subject divided into thirds. OR
Use Your Camera Take a photo of your subject. With newer cell phones you can edit your photo on the phone. Select the “crop” feature and you should see your photo with a 1/3 grid superimposed on it. You can also import your photo into these great cell phone and computer apps: AccuDraw, AccuView, or Grid Drawing Assistant (free). Each of these will grid any photo on your camera. It can also display your photo in black and white, which helps you to see the value structure of your subject. These apps do not permanently alter your original photo.
Gird your canvas This is where you’ll save lots of time drawing. Use the Ruler of Thirds to divide your canvas into thirds. If your canvas is 11 x 14, find the 11” mark on the ruler. That distance, from the left side of the ruler to the 11” mark is exactly 1/3 of 11”. Mark off that distance on both of the 11” sides of your canvas. Next, find the 14” mark on the ruler. The distance from the left side of the ruler to the 14” mark is exactly 1/3 of 14”. Mark this distance off on the two 14” edges of your canvas. Connect the marks and your canvas is divided into thirds. No inconvenient measuring or having to divide 11” by three to figure out how many inches 1/3 of 11 is. The Ruler of Thirds does this for you.
Draw your compostion: Looking through your gridded viewfinder, or looking at your gridded photo, to transpose what you see, segment by segment, to your gridded canvas. Your drawing will be in correct proportion and it will fill your canvas. It’s so much easier and quicker to draw this way.
[/fusion_text]
